Stickers can be a great way to express yourself or to advertise your products or services. You might want to apply your sticker to your car window or any other surface. In order to apply stickers, you may need to prepare the surface for its application.
This involves cleaning the surface area, positioning the sticker, and so on. Sometimes, a chemical solution might be required to apply larger stickers. Here, we’ve provided some tips and tricks that would help you apply your stickers with greater ease. So, let’s take a look at them right away.
1. Begin with a clean surface
Wash the area where you intend to apply the sticker first. You can either use soap, water, or a solution that mostly contains isopropyl alcohol. If you’re using the isopropyl solution, it’s recommended that 50% of it is water and 50% isopropyl alcohol.
It’s our suggestion not to use window-cleaning products. Make sure that no soap or residue remains if you’re using soapy water. Any type of residue left behind would prevent your sticker from being applied properly. If you’re cleaning with soapy water, rinse thoroughly with water.
2. Apply in the presence of an appropriate temperature
The temperature must be right when you’re applying your sticker. It’s not always important, but this does matter in certain cases. Apply your stickers in a shaded area for the best results. This particular place must be away from direct sunlight. If possible you should apply your sticker when the temperature is between 50 and 90 degrees Fahrenheit.
3. Use a masking tape
It is important that your sticker is positioned properly before its application. This can be ensured with the use of masking tape. Leave the white backing paper in place, facing the surface you intend to apply the sticker to. Next, position your sticker and place a piece of masking tape along the sticker’s top edge. This would fix it in a proper location.
Then, peel off the backing paper by lifting the sticker. Hold on to the bottom edge and lower the sticker in slow motion. You can use the thumb of your other hand and press from the centre out. While doing so, work your way gradually from the top to the bottom.
4. The wet method
Most of the smaller decals can be applied without the use of water. However, using water might be necessary in the case of larger stickers. Once you’ve cleaned the surface area, moisten it with a solution of 5% soap and 95% water. For the best results, use a spray bottle to do.
While the surface is still wet, apply your sticker. This would prevent it from sticking immediately and give you the chance to reposition the sticker if required. You would also have the opportunity to remove bubbles if any. The soapy water dries in a matter of minutes and leaves your sticker firmly applied.
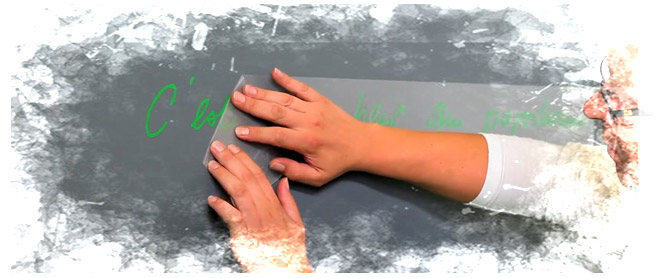
5. The transfer tape
In recent times, you’ll find stickers with three layers. The first layer is the transfer tape, the second is the sticker, and the bottom layer is a white paper. The top layer clings to the sticker’s non-adhesive side. The bottom layer is the backing paper that clings to the adhesive side of the sticker. You must apply pressure evenly across the transfer tape before applying such stickers. It can be done with a plastic card or a squeegee.
After you’ve applied your sticker leave the transfer tape in place for at least three hours. During the winter months, you might need to leave the transfer tape for up to 24 hours or more. Once it is left for a sufficient amount of time, remove it gently.